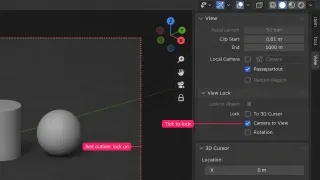
Blender's Video Sequencer can cut footage, mix sound, add titles and transitions, and export a finished movie. I'd choose it when the edit belongs beside a Blender scene: a Scene strip keeps that 3D shot editable in the same file. For a first standalone edit, start with File › New › Video Editing, import a movie with its sound, and use Render › Render Animation after checking the edit's scene, range and video output.
This guide uses Blender 5.2 LTS and the default keymap. The worked edit joins two short shots, preserves their picture/sound timing, adds a half-second dissolve and a title, then writes a movie you can play outside Blender. You don't need to learn modeling first.
Choose Blender for the work the edit needs
| Your project | My choice and the deciding work |
|---|---|
| A short cut with titles, music and a few effects | Blender fits. Movie, Sound and Text strips plus transitions cover the assembly; finish the small edit below before adding more effects. |
| Footage intercut with a Blender animation | A strong fit. A Scene strip uses another scene's render output, so you can revise the shot without exporting and re-importing a movie after each change. |
| An interview with several angles and substantial dialogue work | Possible, with preparation. Blender's multicam workflow starts by aligning the sources yourself. Plan sound levels, music automation and cleanup separately; I'd favor a dedicated editor when those jobs dominate. |
| A long or high-resolution timeline, or an edit another application must continue | Check proxy playback and the receiving application's exchange requirements first. Smooth preview and a transferable timeline are separate requirements from being able to render an MP4. |
The timeline has channels, not a special track type for each medium. Higher picture channels appear in front of lower ones; two picture strips in the same channel can't overlap. Sound strips behave differently: overlapping sounds mix, so putting music above a voice doesn't silence the voice.
Open the editor with a known starting state
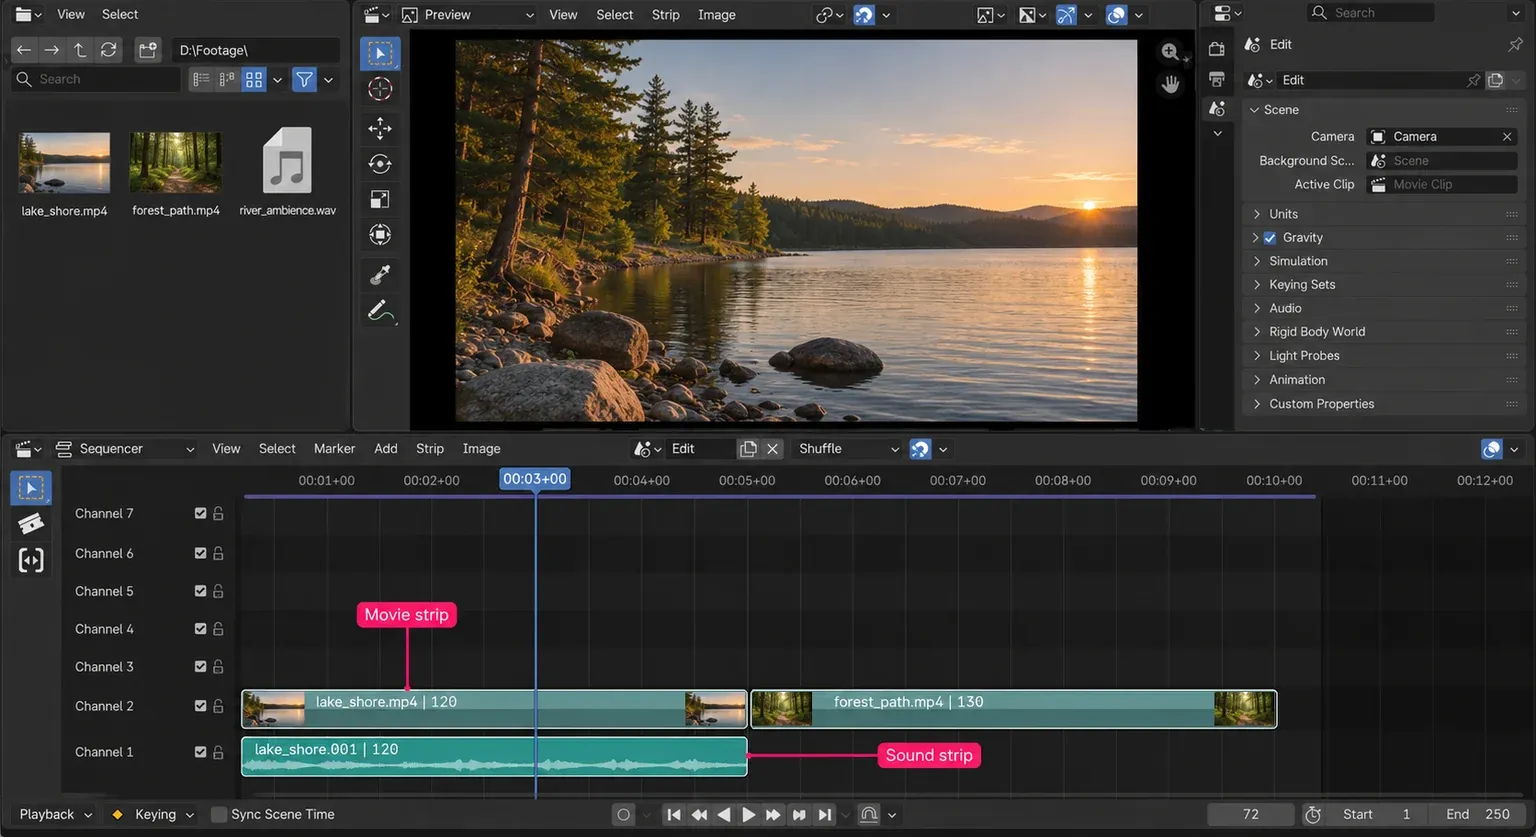
Save any existing project before choosing File › New › Video Editing: that starts a new file. The Video Editing template opens a File Browser, Preview, Sequencer and Properties editor. Its Edit scene starts at 1920 × 1080, 24 FPS and ten seconds, with video output prepared. Those are starting values, not the duration or rate of every edit.
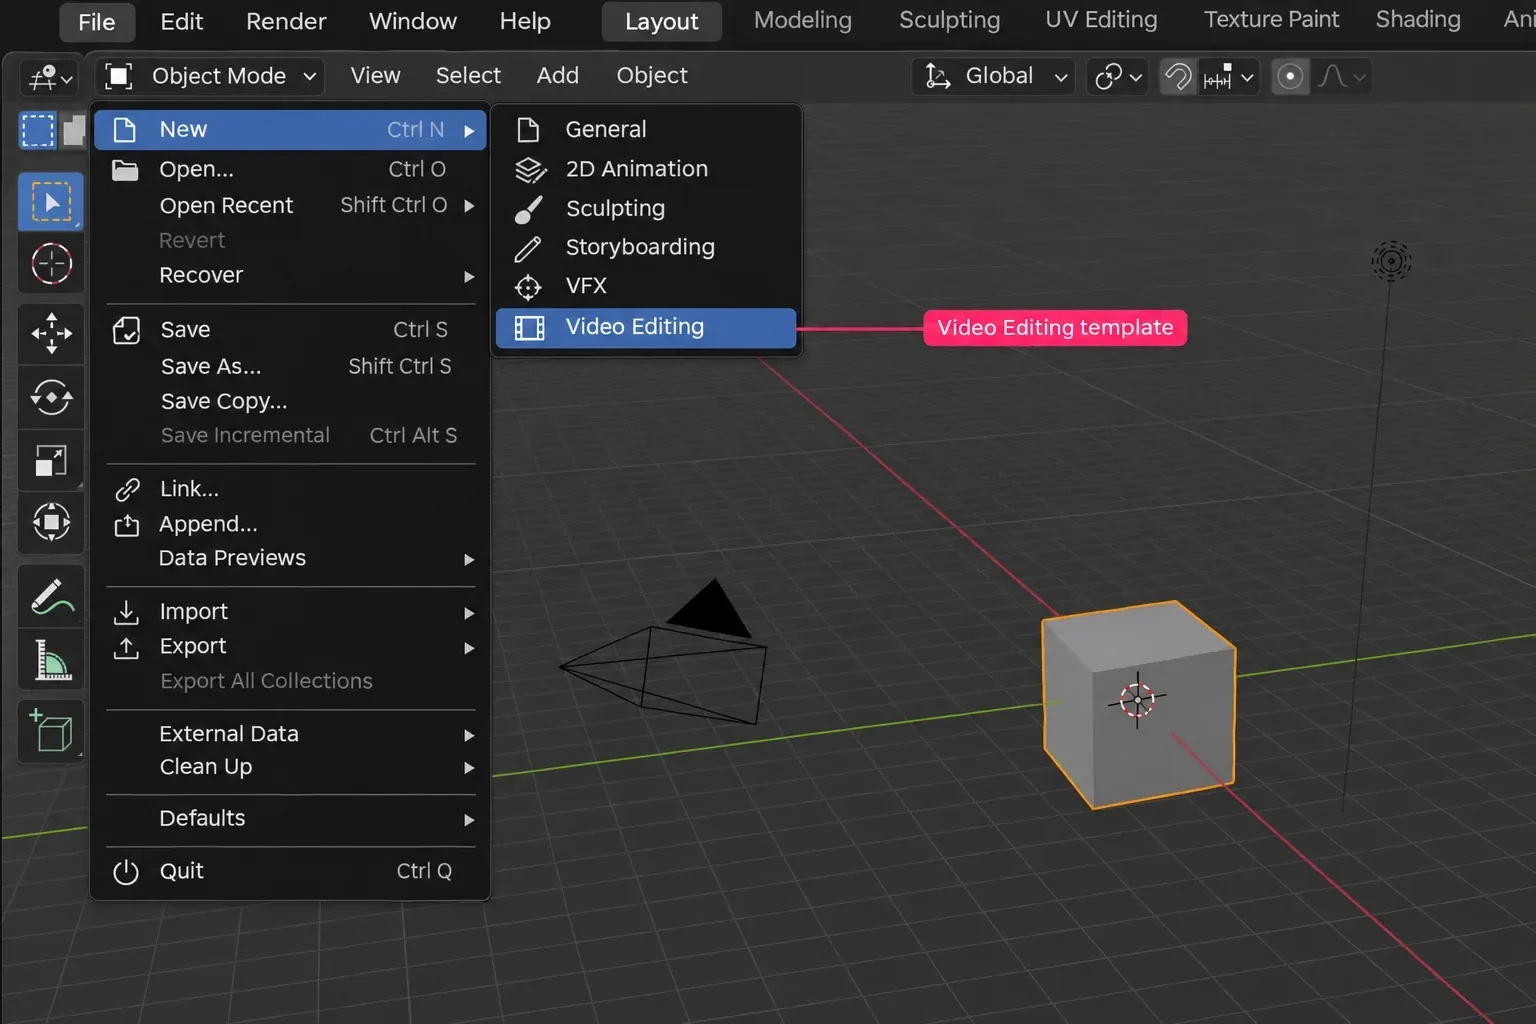
Save the new blend-file in a project folder and keep the footage in a stable location. A Movie strip references the original media file; saving the blend-file doesn't copy that movie into it. Moving the source later breaks that reference.
To keep an existing 3D file open, use the + beside the workspace tabs, then Video Editing › Video Editing. Adding a workspace adds a layout, so inspect its scene and Output settings rather than assuming it applied the new-file preset. Use New in the Sequencer header to create an edit scene, or select the intended existing scene there.
Shortcuts below act on the editor under the pointer. Keep it over the Sequencer timeline for selection, cuts and time moves. Enable View › Playback Controls there if the current-frame field is hidden. With a strip active, look in the Properties editor's Strip context for its controls: strip properties moved there in 5.0. Older instructions sending you to Sidebar › Strip don't describe that layout.
Make a complete two-clip edit
For this example, use two clips at 24 FPS, each at least five seconds long, with one video stream and one audio stream whose imported starts align. Choose ambient sound rather than overlapping speech for the dissolve. The frame values below are teaching inputs: two 72-frame shots with a 12-frame overlap make a 132-frame, 5.5-second edit. For other frame rates, use your project rate to calculate the same durations.
1. Import picture and sound as a pair
- Over the Sequencer, choose Add › Movie. Select the first clip. Keep Sound and Adjust Playback Rate enabled; for this first import, also enable Set Scene Frame Rate.
- In the import options, disable Move Strips to expose numerical placement. Set Start Frame: 1 and Channel: 1, then add the file. With this one-video/one-audio source, Sound occupies channel 1 and Movie channel 2.
- Read Properties › Output › Format › Frame Rate. It should be 24 FPS for these example clips. Scrub and play a little of the footage: the picture should appear in the Preview and its own sound should match.
Set Scene Frame Rate changes the project rate; Adjust Playback Rate preserves a clip's normal speed at the project rate. They solve different problems. On later imports, leave Set Scene Frame Rate off and Adjust Playback Rate on. A source with several streams produces more strips, and the importer preserves encoded delays between them; don't force every stream to an identical start if the file contains an intentional offset.
2. Cut both strips and move them together
- Choose Select › None, then Select › Box Select and enclose the centres of the first clip's Movie and Sound strips. Verify both are selected, rather than just an end handle. Imported connections may already select them together; the visible selection is what matters.
- Enter 73 in the current-frame field. With both strips selected, choose Strip › Split (K). Deselect, select the two unwanted pieces to the right of the cut, verify that only those tails are selected, then use Strip › Delete. The retained pair covers frames 1–72.
- Add the second movie with Sound and Adjust Playback Rate on, Set Scene Frame Rate off, Move Strips off, Start Frame: 73 and Channel: 3. Its Sound belongs on channel 3 and Movie on channel 4.
- Select that new pair, split at frame 145, and delete its unwanted tails in the same way. The two retained shots now form a six-second hard cut: frames 1–72, then 73–144.
For a time move, select both strip centres and use Strip › Transform › Move (G), then X to constrain it horizontally. Blender's Move command moves the selected strips together; dragging one strip directly is a different operation. Check that picture and sound receive the same change in position. Y constrains a Move to channel changes instead.
For a simple handle trim, select the corresponding right or left handles on both strips, then use G. Trimming changes the visible source range; moving the centres changes when it plays. Split keeps hidden source frames recoverable by extending the handles within the available media. Hold Split (Shift + K) sets a different boundary, so use the ordinary Split for this exercise.
Play through each cut and watch a visible event that has a distinct sound. If the pair was aligned before one move and is offset afterwards, undo that move and repeat it with both strips selected. A constant offset, a gradually changing speed mismatch and a stuttering preview need different fixes.
3. Replace the hard cut with a deliberate dissolve
- Select the second Movie/Sound pair. Press G, X, type -12, then confirm. It now starts at frame 61; its final included frame is 132. Keep it on channels 3 and 4 so the picture can overlap the first shot.
- Select only the two Movie strips. In the default keymap, Alt + click selects an individual strip while ignoring its connections; Shift + Alt + click adds the other Movie. Click strip centres and verify the Sound strips aren't selected.
- Choose Add › Transition › Crossfade. Place the transition above its inputs, on channel 5, if placement is required. Its overlap spans frames 61–72: half a second at 24 FPS.
- Select only the two overlapping Sound strips using the same Alt selection, then choose Add › Transition › Sound Crossfade. Listen across the join; don't leave two ambient tracks abruptly doubling in level.
The default Sequencer keymap assigns Alt selection to Ignore Connections. Use it for a deliberate picture-only or sound-only operation; use both members again for shared timing changes. Connected selection isn't the same as Select Linked, which can select neighbouring strips.
The overlap defines the transition duration. Without an overlap, Blender uses the last frame of each input, which can produce a frozen-looking transition. If the dissolve goes from the wrong input to the other, select the effect and use Strip › Effect Strip › Swap Inputs. For dialogue, I'd retain a hard picture cut or plan the sound edit separately rather than blend two sentences just to use an effect.
4. Add a readable title and check the mix
- Deselect the footage, move the playhead to frame 1 and choose Add › Text. Keep the Text strip above the pictures and transition, on channel 6.
- With Text active, use Properties › Strip › Time: set Left Handle: 1 and Strip Duration: 48. That displays the title for two seconds, through frame 48; the right boundary is 49.
- In Effect Strip, enter a short title. Start with the Main Title style preset if useful, then adjust the font size and placement. The Text strip's Outline, Shadow and Box controls help it remain readable as the background changes. Check both a bright and a dark frame.
For separate music, use Add › Sound, put it on a free channel, and trim it to the edit's bounds. If you want music without the recorded ambience, use View › Channels and mute the original Sound channels 1 and 3. Don't mute a channel containing picture you still need.
For music under a voice, select the music Sound strip and adjust Properties › Strip › Sound › Volume. Hover over Volume and press I to insert a key. Put keys before speech, at its start, at its end and after it; lower the two middle values to create a dip and recovery. Sound properties can be animated, and overlapping Sound strips are mixed. Listen to the combined result, not each track in isolation. A waveform can help locate a sound, but it doesn't prove that speech is intelligible or that the finished mix meets a delivery loudness target.
Your example should now have these bounds. The strip's right handle is an exclusive boundary; the final included frame is one less. This is also how Set Frame Range to Strips calculates the render end.
| Element | Channel | Included frames |
|---|---|---|
| First Sound / Movie | 1 / 2 | 1–72 |
| Second Sound / Movie | 3 / 4 | 61–132 |
| Picture crossfade | 5 | 61–72 |
| Text | 6 | 1–48 |
Export the whole edit to a movie
Keep the Edit scene active for this first project. The Sequencer Scene can differ from the window's active scene; Output settings normally follow the latter unless Properties is pinned. Before changing them, verify they belong to the scene holding your edit.
- Set the range. Over the Sequencer, use Select › All, then View › Range › Set Frame Range to Strips. Check Properties › Output › Frame Range. For the example, Start is 1 and End is 132. Remove or trim an unused long music strip before doing this, or it extends the result.
- Set the canvas. Under Output › Format, verify Resolution X/Y, percentage and Frame Rate. For a 1920 × 1080 delivery use 100% and the example's 24 FPS. To match a Movie strip instead, select it and use Strip › Movie Strip › Set Render Size; still check the percentage afterwards.
- Choose a real output file. Enable the checkbox in the Output panel header, choose an existing writable folder and a distinct filename, and set Media Type: Video. The Output panel controls whether animation renders are written; its Encoding panel chooses the streams inside the movie.
- Choose delivery encoding. For an ordinary SDR review copy, start with Container: MPEG-4, Video Codec: H.264, 8-bit color and Audio Codec: AAC, with Stereo audio. Choose an Output Quality preset appropriate to the delivery, then inspect the written result. Containers and codecs must be compatible, and H.264 needs even width and height. No Audio deliberately omits the soundtrack.
- Render the Sequencer. Under Output › Post Processing › Pipeline, enable Sequencer. It renders the edit instead of the active 3D camera view. Save the file, then use top-bar Render › Render Animation (Ctrl + F12). If the active and Sequencer scenes differ, choose Render Sequencer Animation when that separate command is offered.

Open the written movie in a video player. Check its full duration, first and last frames, title, transition, picture/sound sync and audible music or dialogue. For the example, it should last 5.5 seconds with no black tail. Also inspect fine text, gradients and motion for unacceptable compression. The Sequencer Preview is a working view; this file is what the recipient receives.
Fix the specific failure instead of rebuilding the edit
| What happened | Check and recovery |
|---|---|
| Picture and sound become offset after a cut or move | Inspect that pair's selection and matching edit boundaries. Undo the offending operation and repeat it on both strips. Preserve any original stream offset; don't fix a known shared move by randomly slipping the sound. |
| Sync drifts gradually through an otherwise continuous clip | Check project rate, source rate and whether Adjust Playback Rate was enabled on import. In a copy of the project, add the source again with that option enabled and compare an uncut passage before replacing edited material. Constant offset and rate mismatch are different diagnoses. |
| The file stops early or contains a long black tail | Check the rendering scene's Start/End and the actual selected strips used to set the range. A long sound or unused strip can extend it; the template's original ten seconds can also outlast a short cut. |
| The camera view renders instead of the timeline | Verify the edit's scene and its Sequencer Pipeline checkbox. Use the separate Sequencer render command when appropriate. |
| The written movie has no sound | First check source audio and Sound-strip/channel mute states, then the strip Volume and Output › Encoding › Audio Codec. No Audio cannot produce an audible soundtrack. Recheck the saved movie in a player with sound enabled. |
| Source media disappears after moving a folder | Restore its old location, or select the affected strip and use Strip › Inputs › Change Path/Files to point to the intended source. Relink the associated sound too; verify timing before saving the repaired project. |
| No output file, or the render fails immediately | Check the Output panel's saving checkbox, destination permissions, scene range and compatible encoding. Use an existing folder and a new filename; don't overwrite the only finished delivery while diagnosing it. |
For a picture that doesn't fill the canvas, first decide whether borders or cropping are acceptable. Scale to Fit preserves the whole image and can leave borders; Scale to Fill fills the canvas and can crop; Stretch to Fill can distort it. Those Movie import fit choices preserve different things. Changing the render size is appropriate only when the intended delivery size changes too.
Separate slow preview from the final output
High-resolution footage can make preview playback slow. I'd set up proxies before changing the project's final resolution: Blender's proxy workflow creates lower-resolution working copies for the preview.
- Over the Preview, open View › Sidebar (N), then its View tab. Choose a smaller Proxy Render Size. This enables that proxy resolution for the strips and starts building it.
- For explicit per-strip setup, use the Sequencer Sidebar's Proxy controls to set storage, the selected strip proxies and rebuilding. By default, generated movie proxies live under BL_proxy beside the footage; retain the original media.
- After generation, play the same short section again. Keep Output resolution/percentage at the intended delivery values; reducing preview size doesn't choose a smaller delivery canvas.
| System | What it changes | What to keep separate |
|---|---|---|
| Proxy Render Size | Lower-resolution media used while editing | It isn't a substitute for retaining the originals or setting final Output resolution. |
| Memory cache and Prefetch | Frames retained or prepared for preview playback | More cached frames don't change the cut or repair source timing. |
| Render Animation | The saved output of the chosen scene and range | Check the written movie; a rough working preview isn't an encoding verdict. |
The cache stores preview frames in memory; its limit is in System preferences, and Prefetch prepares frames ahead of the playhead. Enable the cache overlay to see coverage. Don't allocate nearly all available RAM to it. Prefetch doesn't support Scene strips, so a heavy live 3D shot has a different cost from reading an ordinary movie.
Extend the edit where Blender adds something useful
Keep a 3D shot live, or render it once for easier editing
Put the 3D work in a different scene from the edit, then use Add › Scene › your scene. A Scene strip can't refer to its own sequence's scene. Choose its Camera input for the shot, and frame the camera in the 3D scene. Change that scene's animation, materials or lights and the referenced shot remains connected to the work.
Use Sync Scene Time in the 5.2 Sequencer Playback Controls when you want the active 3D scene to follow the scene strip under the playhead. For a heavy shot whose appearance is settled, I'd render an image sequence and add it through Add › Image/Sequence. The image-sequence output workflow lets you restart a failed 3D render from an affected frame, while the edit reads completed images. Preserve the editable scene for later revisions.
The Preview's View › Render Still Preview and Render Sequence Preview use its Scene Strip Display shading, initially Solid. Use the top-bar animation render for the finished shot, or deliberately set Preview Sidebar › View › Scene Strip Display › Shading: Rendered for a rendered preview. The Preview rendering controls have that distinct purpose. The Sequencer pipeline includes Scene strips; when Compositing is enabled too, their compositor output also matters.
Color, effects, subtitles and speed have their own controls
For an active picture strip, Properties › Strip Modifiers offers color adjustments such as Color Balance, Curves and White Balance. An Adjustment Layer can apply modifiers across several strips. Their Preview and Render toggles are independent: check both if an effect is visible while editing but missing in the file. Add › Compositor provides a node-group effect strip when the job needs more than those direct adjustments.
Use Text strips for timed captions as well as titles. View › Export Subtitles in the Preview or Sequencer writes a SubRip .srt file containing all Text strips. Open it in a text editor and remove title cards that aren't meant to be read as speech before delivering the subtitle file.
For speed changes, use Strip › Retiming › Set Speed or Add Freeze Frame and Slide, then inspect the associated sound and downstream timing. Retiming changes strip content, not existing property animation, so an opacity or title animation may need separate adjustment.
Know when to move the job to a dedicated editor
Blender has animated sound levels, crossfades, Echo, Pitch and a Sound Equalizer; calling it incapable of audio editing is inaccurate. For repeated dialogue repair and music riding, count the actual operations: source alignment, cleanup, volume keys, fade checks and delivery checks. I'd choose an editor with the required dialogue and finishing workflow already arranged when those tasks are most of the project. A basic two-clip mix doesn't demand that switch.
Timeline exchange needs a version-specific check. The 5.3 Sequencer notes introduce initial OpenTimelineIO import/export; don't assume a 5.2 project has that route, or that an MP4 preserves editable cuts, effects and live scenes. Those notes also rename Expand to Ripple and change editing and playback controls, so follow instructions for the version you use. For an existing production file, keep a recoverable copy when moving between Blender versions and verify the receiving application's actual result before committing the handoff.